Hello followers and fellow food lovers! I am back at it and excited to share with you my latest culinary creations in a new blog that's a little more applicable to what I want to share. I would love for you to join my new journey and follow me, so check out:
http://wholefoodsjunkie.com/
Be sure to leave a little note to tell me you've tuned in. Also, please leave any links to your blogs, so I can be sure to connect from my new post on Whole Foods Junkie!
Happy Fooding,
Angie
Monday, October 14, 2013
Wednesday, April 6, 2011
Life changes mean new life ventures!
You all know I'm really good at gungho posting for a few months only to follow that with a ridiculously long dry spell. Well, life has changed just a little in the past few weeks, and I now find myself at a crossroads. This newfound time has led me to explore a new venture, and that has brought me back to this blog.
The first change is this:
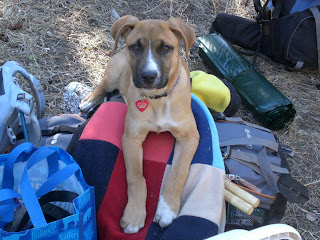
Meet Raia, our nearly 4 month old pit bull/german shepard puppy! She is becoming an awesome companion, and her arrival into the family couldn't have been more timely... since I recently lost my job.
About three weeks ago, I found out that the gallery lost its space due to a building renovation, so for the first time in my life I'm on the unemployment line. I never knew what having so much idle time would be like, and I find myself waking up every morning thinking: "what am I going to do today."
Other than taking the dog for a walk, I've decided to fill up my free time by authoring a cook book!
That's where this blog comes in. Using recipes I've blogged about in the past, and other recipes in my arsenal, I'm going to compile a killer cookbook and blog about the testing here on my site. I won't post all the recipes, because then what would the book be for, but I will share tips, tricks, and some of the goodies I make with you all so that you can continue to be inspired to cook great, healthy food.
If you have any recipe suggestions of foods I should test, I would love to hear 'em: amarasco@alumni.cmu.edu.
Thanks for reading and supporting my new venture! If you're a fan of my blog, you'll be the first to preview the book before it (hopefully) gets published!
The first change is this:

About three weeks ago, I found out that the gallery lost its space due to a building renovation, so for the first time in my life I'm on the unemployment line. I never knew what having so much idle time would be like, and I find myself waking up every morning thinking: "what am I going to do today."
Other than taking the dog for a walk, I've decided to fill up my free time by authoring a cook book!
That's where this blog comes in. Using recipes I've blogged about in the past, and other recipes in my arsenal, I'm going to compile a killer cookbook and blog about the testing here on my site. I won't post all the recipes, because then what would the book be for, but I will share tips, tricks, and some of the goodies I make with you all so that you can continue to be inspired to cook great, healthy food.
If you have any recipe suggestions of foods I should test, I would love to hear 'em: amarasco@alumni.cmu.edu.
Thanks for reading and supporting my new venture! If you're a fan of my blog, you'll be the first to preview the book before it (hopefully) gets published!
Wednesday, November 3, 2010
Canning Crazy!
If you've noticed, I've been a bit MIA over the past 10 days or so because I have been a kitchen maniac. The canner came out a few days ago, and hasn't gone back in its home since.
It all started when I found a little farmer's market in town last week. The guy was selling organic Colorado apples, and I bought a 15 pound box for cheap! So I set out to make homemade apple sauce. Then some of the apple sauce became apple butter. Then, since the canner was out, I decided to attack the BOX of onions that I harvested from our garden....and those got pickled. Then I had a ton of pickling liquid left over, so I made pickled cauliflower and pickles. That's one heck of a domino effect, ya think?
The fruits of my labor yielded:
4 quart jars of home made apple sauce
4 half pint jars of home made apple butter
10 half pint jars of pickled onions
4 pint jars of pickled cauliflower
5 quart jars of dill pickles
2 pint jars of sweet pickles
 (from left to right: pickles, apple sauce, sweet pickles, cauliflower, apple butter, and pickled onions!)
I'm pooped! Although, I might get back at it again and can some home made marinara sauce sometime soon :)
Does all this fruiting of labor make my Halloween Costume any more appropriate:
 Haha, I rule (at least I think so)!
It all started when I found a little farmer's market in town last week. The guy was selling organic Colorado apples, and I bought a 15 pound box for cheap! So I set out to make homemade apple sauce. Then some of the apple sauce became apple butter. Then, since the canner was out, I decided to attack the BOX of onions that I harvested from our garden....and those got pickled. Then I had a ton of pickling liquid left over, so I made pickled cauliflower and pickles. That's one heck of a domino effect, ya think?
The fruits of my labor yielded:
4 quart jars of home made apple sauce
4 half pint jars of home made apple butter
10 half pint jars of pickled onions
4 pint jars of pickled cauliflower
5 quart jars of dill pickles
2 pint jars of sweet pickles

I'm pooped! Although, I might get back at it again and can some home made marinara sauce sometime soon :)
Does all this fruiting of labor make my Halloween Costume any more appropriate:

Thursday, October 21, 2010
Lunch for One
I watched an episode of Giada the other day where she made this baked "salad" that was a combination of Caprese and Panzanella salads.
A Caprese salad is a classic salad of fresh mozzarella, sliced ripe tomatoes, fresh basil, olive oil and sometimes balsamic (or a balsamic reduction). Panzanella is typically a grilled vegetable salad of tomatoes and squashes that also includes grilled bread mixed in. Both are very delicious. And very Italian :)
The bake Giada made was a large party sized thing in a tray, but I modified it to make a nice 4-5 point lunch for myself. I used a mini loaf pan and the following ingredients:
two small tomoatoes or four slices of tomato about 1/2" thick
one clove of garlic minced
one ounce of fresh mozzarella sliced (sliced to fit the pan)
one-two tablespoons olive oil
two fresh basil leaves
one piece whole wheat bread
balsamic vinegar
salt and pepper
Spray the mini loaf pan with cooking spray, place the four slices of tomatoes in the bottom and pour about a tablespoon of balsamic over then sprinkle with salt and pepper and half the minced garlic. Place the slice of mozzarella on top and add the rest of the garlic and the basil (chopped). Cut the bread to just fit the top of whatever pan you're using, and place it on top of the cheese. Drizzle liberally with olive oil, so it gets nice and crusty.
Bake at 350 for about 15 minutes or until the cheese is melty and the bread is toasty.

Carefully remove from the pan and enjoy! It might be juicy under there, so watch out!
Thursday, October 14, 2010
Pot, Stock, and a Hell Roaring Time
The final adventure of Nicole's visit included a hike via the Hell Roaring trail to a great vista along a 12,500 ft ridge. Its called the Hell Roaring trail because in June during peak runoff, the water rages through the area to a deafening tone, its hell roaring. Of course, it being October, the snow is just starting to fall. So we didn't have too much raging water, but we did have fresh snow!
The snow we've had up high over the past week made it an interesting hike with some post holing near the top, but it was all worth it to take in this:

Maybe Jim and I even got our Christmas card photo, haha!

The evening ended with a soak in the Penny Hot Springs; a little known spot that Jim and I hadn't yet discovered, but we're now excited to know that we have free hot springs only 20 minutes away!

In honor of this snowy hike, I thought I'd post a great soup recipe. We didn't eat this after our hike; we went out and gorged on some awesome BBQ, but I've been wanting to share this recipe, and what better time to do it than on a crisp fall day!
Soni's Potato Soup
Soni is my mom, and she is known for making some excellent soups. I made this potato soup with potatoes that I dug up out of the garden myself that very morning and an onion from the same origin. I think it tasted a little bit better just because of that.
5 lbs Yukon Gold Potatoes (unpeeled if they are small or the peel is thin)
1 quart chicken stock plus water as needed
1 onion diced
3 tbs butter
1-1/2 cups milk (I used fat free)
2 tbsp corn starch plus 2 tbsp more milk
1 head garlic (optional)
Salt and Pepper to taste
Take the head of garlic, wrap it in foil and stick in a hot oven. Let it roast until the cloves are soft and mushy (this is optional). Cube the potatoes and place them in a pot with the diced onion. I used a 6 quart soup pot. Add in the chicken broth and top off with water (if the chicken stock isn't enough) JUST to cover the potatoes. You want them to barely be covered with the liquid. Add a few pinches of salt and bring the potatoes to a boil. Boil for 10-15 minutes or until the potatoes are just fork tender. You don't want them to be as soft as you would for mashing.
Turn the heat down to a simmer and stop the boil. Add the milk, butter, and more salt and pepper to taste. If you are adding the roasted garlic, squeeze the soft cloves out of the head and add them at this time also. Let simmer for 15 minutes or so, and if it needs to be thicker, add the slurry of corn starch and flour. Don't over do it with this though. Continue to simmer for at least another 15 minutes, stirring occassionally. Taste and adjust salt and pepper as needed.
At this point, the soup is done but I added one more step. I took my emmersion blender and ran it through the soup for just a few turns. It was just enough to thicken the soup by blending up some of the potatoes, but I didn't mash up all the potatoes. The majority of them were still in their chunky form.
Serve with some grated cheddar cheese and some bacon crumbles if desired.
I made a ton of this soup. Enough to give Jim lunch and have two full meals left over with four meals in the freezer and a full meal given to the neighbors. It was a big compliment when Sally, our neighbor, asked how much cream was in the soup. I consider this a pretty healthy recipe, so her thinking there was so much cream in there meant it didn't taste like it! Go me!
Picture coming soon!
Sunday, October 10, 2010
Hiking Among Snowy Peaks
My friend Nicole is visiting from Boston this week, and so far we've had a fun few days of relxing and adventure.
Friday night was the STYX concert at the Belly Up here in Aspen. The Belly Up is a small venue with a maximum of about 400 ticket holders, so we got to see an awesome classic band from about 25 feet away!
The encore performance - Renegade!
Yesterday, my friend Jamie joined us and we headed to the Maroon Bells, which is one of the most popular areas for tourists here in Aspen. With a fresh coating of snow on the peaks surrounding Aspen, the drive up and our hike to Crater lake was nothing short of beautiful.

The only thing that would have made the views better was a blue sky, but the clouds overhead welcomed us with a few little snow showers, so I'm not complaining.


The Maroon Bells are named for their bell-like shape and their very red color of soil and stone, which is hard to see here with their fresh coating of snow.

Like I said, they're pretty gnarly to climb, and this past summer the papers had a few reports of fatalities up there. We took a somewhat short and easy hike to Crater Lake, which is at the base of the Bells. We even got to enjoy a little snow shower while we were sitting around the lake.

We finished off the day with some pub grub and beers at the Aspen Brewing Company!

Friday night was the STYX concert at the Belly Up here in Aspen. The Belly Up is a small venue with a maximum of about 400 ticket holders, so we got to see an awesome classic band from about 25 feet away!
The encore performance - Renegade!
Yesterday, my friend Jamie joined us and we headed to the Maroon Bells, which is one of the most popular areas for tourists here in Aspen. With a fresh coating of snow on the peaks surrounding Aspen, the drive up and our hike to Crater lake was nothing short of beautiful.

The only thing that would have made the views better was a blue sky, but the clouds overhead welcomed us with a few little snow showers, so I'm not complaining.

That's me at the start of the hike at Maroon Lake with the Maroon Bells behind me. This area has several 14-ers (a peak that has a summit at 14,000 or above), which are extremely difficult to summit. Most require extreme mountaineering techniques and a lot of equipment like harnesses and ice climbing gear.


Like I said, they're pretty gnarly to climb, and this past summer the papers had a few reports of fatalities up there. We took a somewhat short and easy hike to Crater Lake, which is at the base of the Bells. We even got to enjoy a little snow shower while we were sitting around the lake.

We finished off the day with some pub grub and beers at the Aspen Brewing Company!

Wednesday, October 6, 2010
Stuffed Mushrooms
I was inspired one day while walking through the produce department of the grocery store when I saw their pre-packaged stuffed portabello mushrooms. I decided to whip up a delicious and filling version of it myself. I've done it twice now and have learned a few things, so I'll tell you how I made them and then offer some addtional suggestions.
Its basically one mushroom per person, so here's for two:
- 2 large portabello mushrooms, stems removed
- 2 tbsp italian dressing
- 1/2 cup low fat ricotta cheese
- 2 wedges laughing cow light garlic and herb
- grated parm
- 2 slices canadian bacon
- 2 cups baby spinach
Olive oil
salt & pepper to taste
Take the mushrooms and rub them with the italian dressing and set aside. In a bowl, mix the ricotta, laughing cow, and parmesan cheese together.
In a skillet, heat up olive oil and wilt the spinach. Dice up the canadian bacon and throw it in the skillet with the spinach to heat through and brown a little. Take this mixture and mix it with the cheese mix.
Salt and pepper the mushrooms and put them gill side down on a medium-high grill (you could also do this under the broiler). Grill them for about 3-4 minutes until the gills turn brown. Flip the mushroom so that the gills are up and fill each with half the mixture. Make sure the mushrooms aren't over a super high flame and close the grill. Let the mushrooms cook for aout 4-5 minutes until the mushroom is soft and dark on the bottom and the filling is heated through.

This goes great with a little cous cous on the side. Also, I love these just as is but Jim thinks they need a little more texture and something to cut the creaminess of the cheese, so next time I make them, I think I will add some bread crumbs to the mixture before putting it on the mushrooms. I guess you could also just sprinkle breadcrumbs on top and let them get crunchy...oo that's a good idea!
Really the sky is the limit with what you can stuff these things with. Give it a shot with your favorite ingredients and let me know how it comes out!
Subscribe to:
Posts (Atom)